
Lenticular Trade Show Booth Graphics for Exhibits
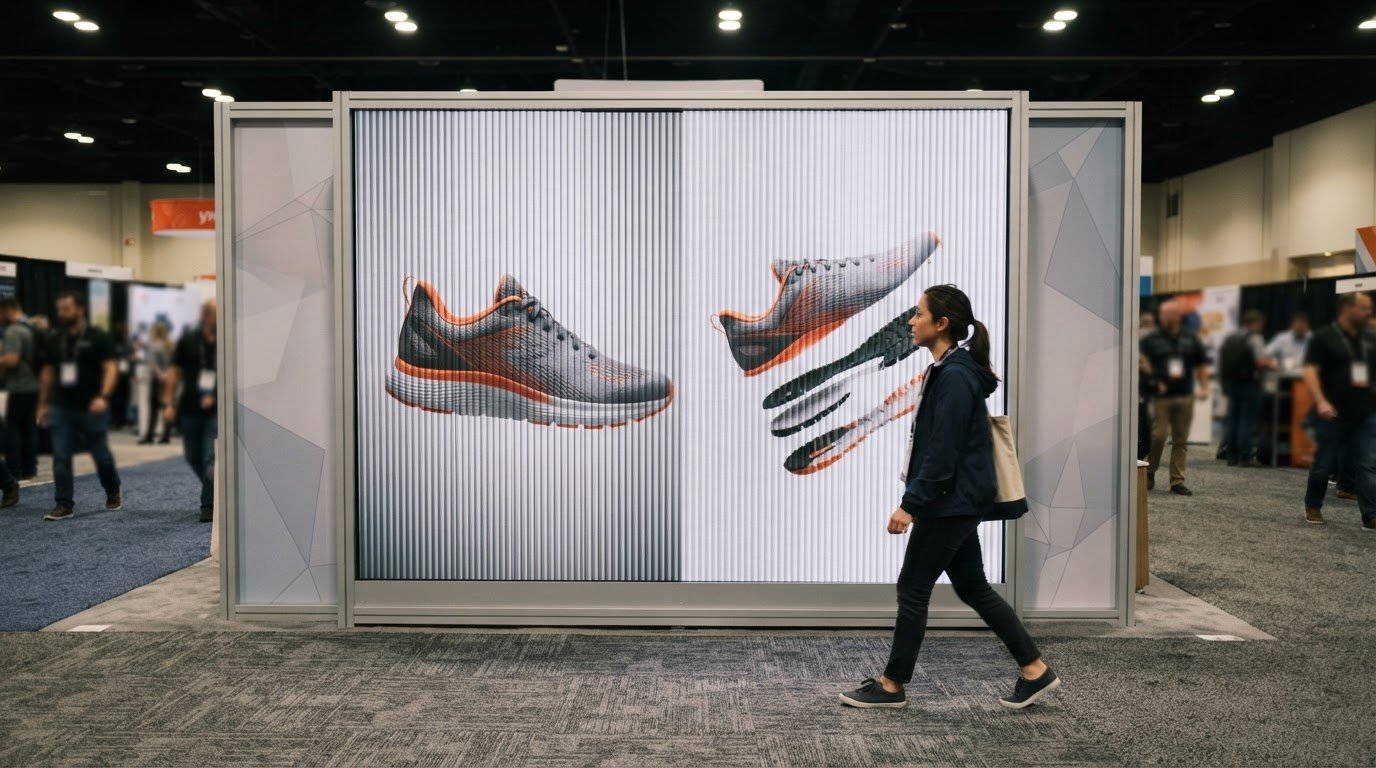
A booth graphic doesn’t have to feel familiar just because it travels from show to show. Lenticular trade show booth graphics can be reused across events—from specialized industry summits to major vendor gatherings like the Los Angeles Real Estate Grand Expo—when they fit the booth layout and the visual message still suits the audience.
That balance matters: attendees move through a busy exhibit hall, so a display needs to catch the eye quickly and communicate clearly. Lenticular imagery changes as people shift their viewing angle, while thoughtful design keeps the main message easy to grasp.
This article explains how to plan graphics for repeat use, choose a suitable size and visual effect, and place them where they can draw attention without crowding the booth. It also covers how clear messaging, readable text, and the surrounding exhibit layout shape the result, helping you plan a display that feels both distinctive and practical.
Key Takeaways
- Plan a graphic around the booth space and viewing distance, keeping its core message clear and easy to absorb.
- Choose between a visual flip, layered depth, or animation by matching the effect to the story you want to tell.
- Use feature walls and backdrops to create a focal point, then consider how the effect can carry across other booth elements.
- Make the visual change a reason to pause, with deliberate placement and uncluttered design helping attendees notice the display.
How big can a lenticular trade show display be?
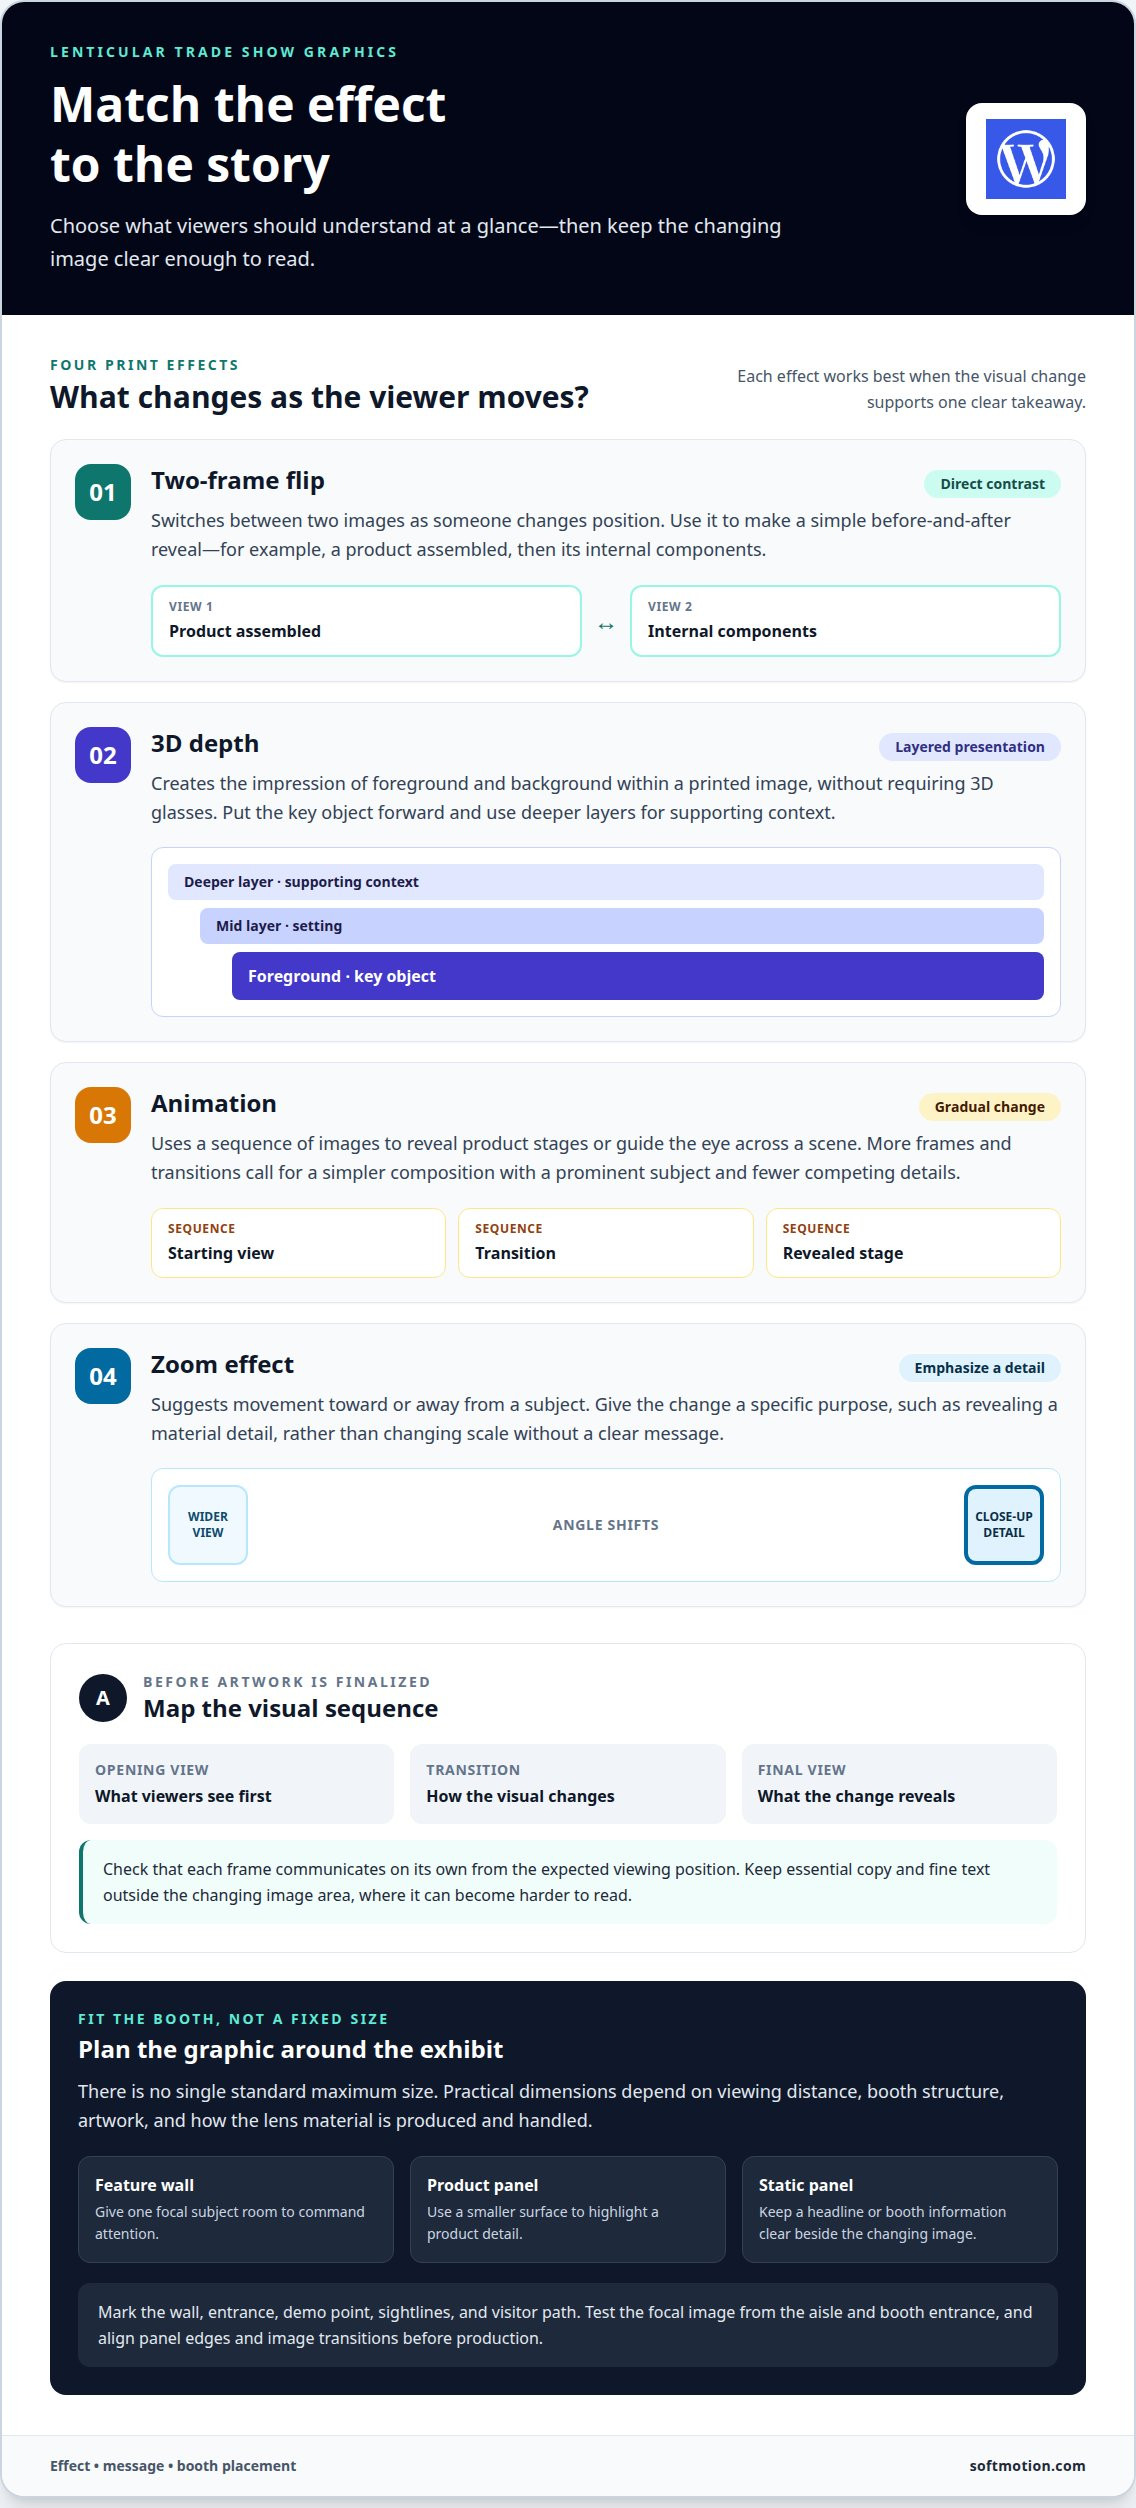
There’s no single standard maximum size for a lenticular display. Practical dimensions depend on viewing distance, booth structure, artwork, and how the lens material is produced and handled. A compact panel can spotlight a product, while a larger feature can shape a back wall. Design lenticular trade show booth graphics around the exhibit footprint, and coordinate panel divisions and image alignment before production.
Start with the booth plan. Mark available wall space, sightlines, product highlight panels, and demo areas. A graphic beside a demo table could show a product changing state, while an adjacent static panel carries the headline. Keep essential copy outside the changing image area, where fine text can blur or become harder to read. Simple messages are especially effective when the design includes several visual changes.
Build proofing, production, and shipping into the show schedule. Approve the artwork, image sequence, panel dimensions, and viewing direction first. Review a proof for legibility and transitions before production. Then plan shipping around the finished display’s dimensions, protective packing, destination, and installation. This gives the team time to address alignment or layout issues before the exhibit arrives.
Lenticular prints combine multiple images behind special lens material, so different visuals appear as the viewer changes position. Unlike LED displays, they don’t rely on electronic screens to create that change. Fabric graphics and standard prints offer static imagery, so choose according to whether the booth needs shifting visuals, a simple backdrop, or screen-based content.
On-site lenticular print production involves preparing images, aligning them with the lens, and using suitable printing equipment. For an on-site build, plan how the finished panels will be handled and positioned. Lenticular trade show booth graphics can connect a feature wall with a product panel or demo backdrop. Smaller lenticular prints can also serve as business cards or postcards.
Two-frame, 3D-depth, and animated print options
Choose an effect by deciding what viewers should understand at a glance. A two-frame flip switches between images as someone changes position. For example, one view can show a product assembled, while the other reveals its internal components. This direct contrast keeps the visual story focused and gives passersby a reason to look again.
For a layered presentation, a 3D-depth effect creates the impression of foreground and background within a printed image. It can make a product appear to sit in front of a setting, without requiring 3D glasses. Use depth to establish visual hierarchy: place the key object forward, then reserve deeper layers for supporting context. The effect adds dimension without replacing the message with decorative complexity.
Animation uses a sequence of images to create a more gradual change as the viewing angle shifts. A custom sequence could reveal a product’s stages or guide the eye across a scene. More frames and transitions call for a simpler composition. Keep the subject prominent, limit competing details, and avoid fine text inside the changing area, where it can become harder to read.
Zoom effects suggest movement toward or away from a subject. They can emphasize a product feature, but the transition should serve a clear purpose. For example, a close-up that reveals a material detail tells a more specific story than an arbitrary change in scale. Match the effect to the intended takeaway, then simplify the surrounding imagery.
Before finalizing artwork, map the visual sequence in order: opening view, transition, and final view. Check that each frame communicates on its own and that the change makes sense from the expected viewing position. If you’re shaping a custom concept, explore lenticular print possibilities as a reference for turning still imagery into a spatial experience.
Using lenticular graphics in feature walls and backdrops
A feature wall gives a changing image room to command attention across the booth. Build its composition around one focal subject, such as a product that shifts from closed to open as visitors move. On a wider back wall, coordinate separate graphic areas so the transition feels intentional rather than fragmented. Lenticular effects can also connect booth sections, linking a backdrop with a product display or demo area.
Choose the format according to the exhibit’s structure and the purpose of each surface. A large-format backdrop can carry the main visual, while a smaller panel highlights a product detail. Vinyl backdrop banners—such as those produced by Banner 4 Sale—provide a familiar, static surface beside the changing image. That contrast can make the lenticular focal point more noticeable while leaving room for booth information and branding.
For installation and repeat use, plan mounting points before the show, protect each panel during transport, clean the surface gently, and store it safely between events. The mounting method and care routine depend on the display’s construction, so include handling steps in the installation plan.
Viewing distance shapes the artwork. Large-format lenticular prints are typically designed to be viewed from a few feet away, so test the focal image and transitions from the aisle and booth entrance. Place the main subject where approaching visitors can see it clearly, and keep essential copy outside areas where the image changes. A headline on an adjacent static panel can stay legible while the feature wall carries the visual motion.
Before finalizing the format, sketch the booth elevation and mark the wall, entrance, demo point, and visitor path. Assign one purpose to each surface: attract attention, explain a product, or support a conversation. This makes it easier to balance a dramatic back wall with practical details. If the wall spans multiple panels, align the image sequence and panel edges in the artwork plan, then review the composition as one continuous exhibit backdrop.
How lenticular graphics attract trade show attendees
Movement can give passersby a visual reason to pause. As someone changes position, an image can shift between views, reveal a product feature, or create depth. For example, lenticular trade show booth graphics could show a product from two angles, giving visitors a quick visual comparison before they approach the display.
Each view should support one clear message. Use a strong subject, a deliberate transition, and a simple focal point. Busy artwork can make the change harder to read, while fine text inside the moving area may blur. Keep essential details on a static panel, and let the changing image demonstrate a product feature or contrast.
Common limitations include angle-dependent viewing and reduced readability for fine text in changing areas. Adding more visual changes can also require a simpler composition. Placement matters: if visitors approach from one narrow route, some may miss the transition. Map sightlines from the aisle and booth entrance, then assess how the effect reads from each position.
In the US, specialist lenticular print vendors produce custom work for trade show displays. A useful project brief names the booth location, likely viewing directions, central message, and product detail the image should reveal. These decisions help turn an exhibit idea into artwork designed around the audience’s approach. Lenticular trade show booth graphics can then serve a specific purpose, rather than adding motion without a clear message.
To shape a concept around a defined exhibit goal, develop a lenticular exhibit concept that connects the visual change to your message. Thoughtful lenticular trade show booth graphics can give visitors a clear point of entry into the story your booth is telling.
Softmotion: Advertising Lenticular Displays
Softmotion creates Advertising Lenticular Displays and Tradeshow Lenticular Graphics for exhibits that need a distinctive visual focal point. Turn to Softmotion when your booth concept calls for printed imagery that shifts with the viewer’s position, whether you want to draw attention to a product or shape a larger visual experience. The design process aligns the image sequence, viewing angle, and booth placement with the exhibit’s message. Softmotion also creates Architectural Lenticular Installations and Fine Art Lenticular Prints, bringing the same medium into different settings. Share your exhibit concept with Softmotion to discuss lenticular graphics for your booth.
Shape the next exhibit around a clear visual idea
Before production begins, define the one idea visitors should remember after leaving your booth. Use it to guide the visual sequence, supporting copy, and placement. This brief gives lenticular trade show booth graphics a purpose beyond motion: each shifting image can contribute to a coherent exhibit story.
Softmotion’s Advertising Lenticular Displays can support promotional messaging, while Architectural Lenticular Installations and Fine Art Lenticular Prints bring the medium into other settings. For an exhibit, connect the intended display effect with its role in the wider booth experience.
Contact Softmotion about booth graphics to discuss a direction for your next exhibit. A thoughtful concept can make movement feel intentional and give visitors a memorable point of connection.
Frequently Asked Questions
Can lenticular pieces be reused at multiple shows?
Yes, a lenticular piece can be reused if it remains intact and still fits the exhibit’s message and layout. For repeat events, protect the printed surface during transport and store panels so they won’t bend or rub against other materials. Reuse works best when the graphic’s branding, product imagery, and dimensions remain relevant to the next booth.
Do lenticular displays need power or screens?
No, a printed lenticular display doesn’t need power or a screen to create its viewing-angle change. That makes it useful in booth areas where cables would interrupt a walkway or demo setup. The effect comes from the printed imagery and lens material, not electronic playback, so the graphic itself doesn’t need a screen connection.
Do you ship displays directly to the show venue?
Softmotion’s project management includes logistical management and on-site assembly for large-scale projects. For a show-bound display, include the venue address, receiving contact, delivery window, and booth schedule in the project logistics plan. These details help coordinate the display’s arrival with exhibit setup, especially when the venue has specific receiving procedures or access arrangements.
How far in advance should I order before my show?
Start planning as soon as your show date and booth layout are set. The schedule depends on artwork preparation, proof review, production, shipping, and installation needs. For example, a multi-panel backdrop may need more coordination than a single graphic. Allow time to review the visual sequence and resolve layout changes before production begins.
What Are Lenticular Prints?
Lenticular prints combine multiple images behind lens material, creating a visual change as the viewer shifts position. A print might show two product views or present a layered image that appears to have depth. The printed artwork and lens are designed together, so the image sequence and intended viewing angle shape the final effect.
What lenticular effects work best for trade shows?
The most useful effect depends on what the booth needs to communicate. Choose a flip to compare two product states, depth to give a hero image a layered presence, or animation to reveal a sequence such as a product’s stages. A zoom can draw attention to a feature. Keep the concept focused on one clear message visitors can grasp quickly.