
Lenticular image printing for angle-view effects and image changes
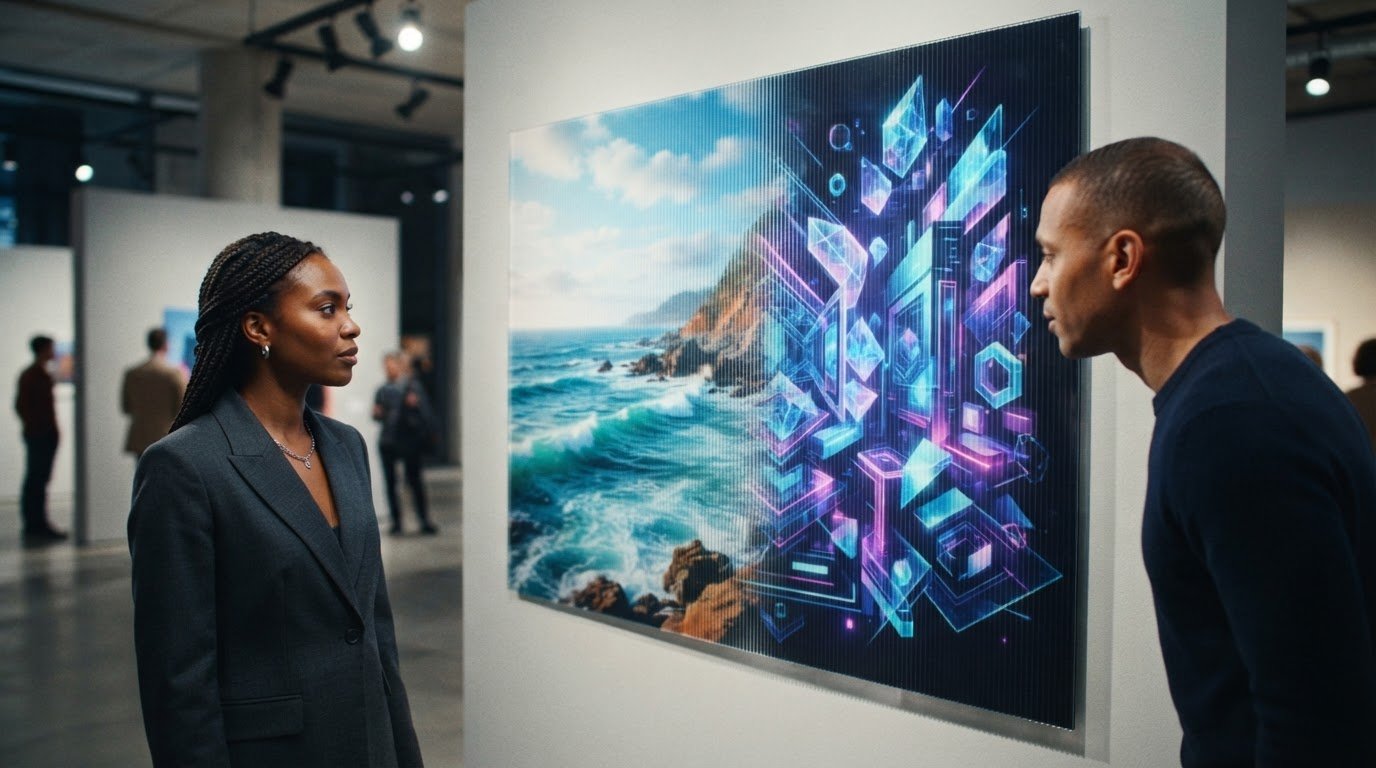
A lenticular print changes as the viewing angle changes: a sheet of tiny lenses directs different parts of the image toward the viewer. That’s how lenticular images can create a flip between pictures, motion, 3D depth, or a morph from one image into another.
The effect may look effortless, but it relies on careful image preparation and precise alignment between the artwork and lens sheet. A change in viewing angle reveals a different view, while the image sequence and setup determine how that transition appears.
This guide explains how lenticular printing works, how flip, animation, depth, and morph effects differ, and how to prepare images for printing. It also covers practical project decisions, from the viewing experience you want to create to the scale and setting where the finished print will appear.
Key Takeaways
- A lenticular lens sheet directs different image strips toward the viewer, creating changes in appearance as the viewing angle shifts.
- Choose a flip, animation, depth, or morph effect based on the visual transition you want people to experience.
- Prepare source images at matching dimensions, then interlace and align them precisely with the lens pitch for a clean result.
- Understanding the history of lenticular printing reveals how an early optical idea developed into a medium for art and display.
- Plan the viewing distance and setting alongside the artwork, since both influence how the finished image reads.
What Is Lenticular Printing and How to Make it?
Lenticular printing places interlaced artwork behind a lens sheet, so different image strips appear as the viewing angle changes. Making a successful print means matching the artwork, lens pitch, printing scale, and intended viewing distance.
Depth and Motion Creation
Each lens directs light from a different image strip toward the viewer. As someone moves sideways, the visible strips change, creating a flip, animation, or stereoscopic depth effect. Depth artwork uses views with slight perspective differences; motion effects use sequential frames to suggest movement. Choose an effect based on how viewers will move and where they will stand. A wall display viewed from farther away needs a different lens pitch than a small hand-held print.
Techniques and Materials
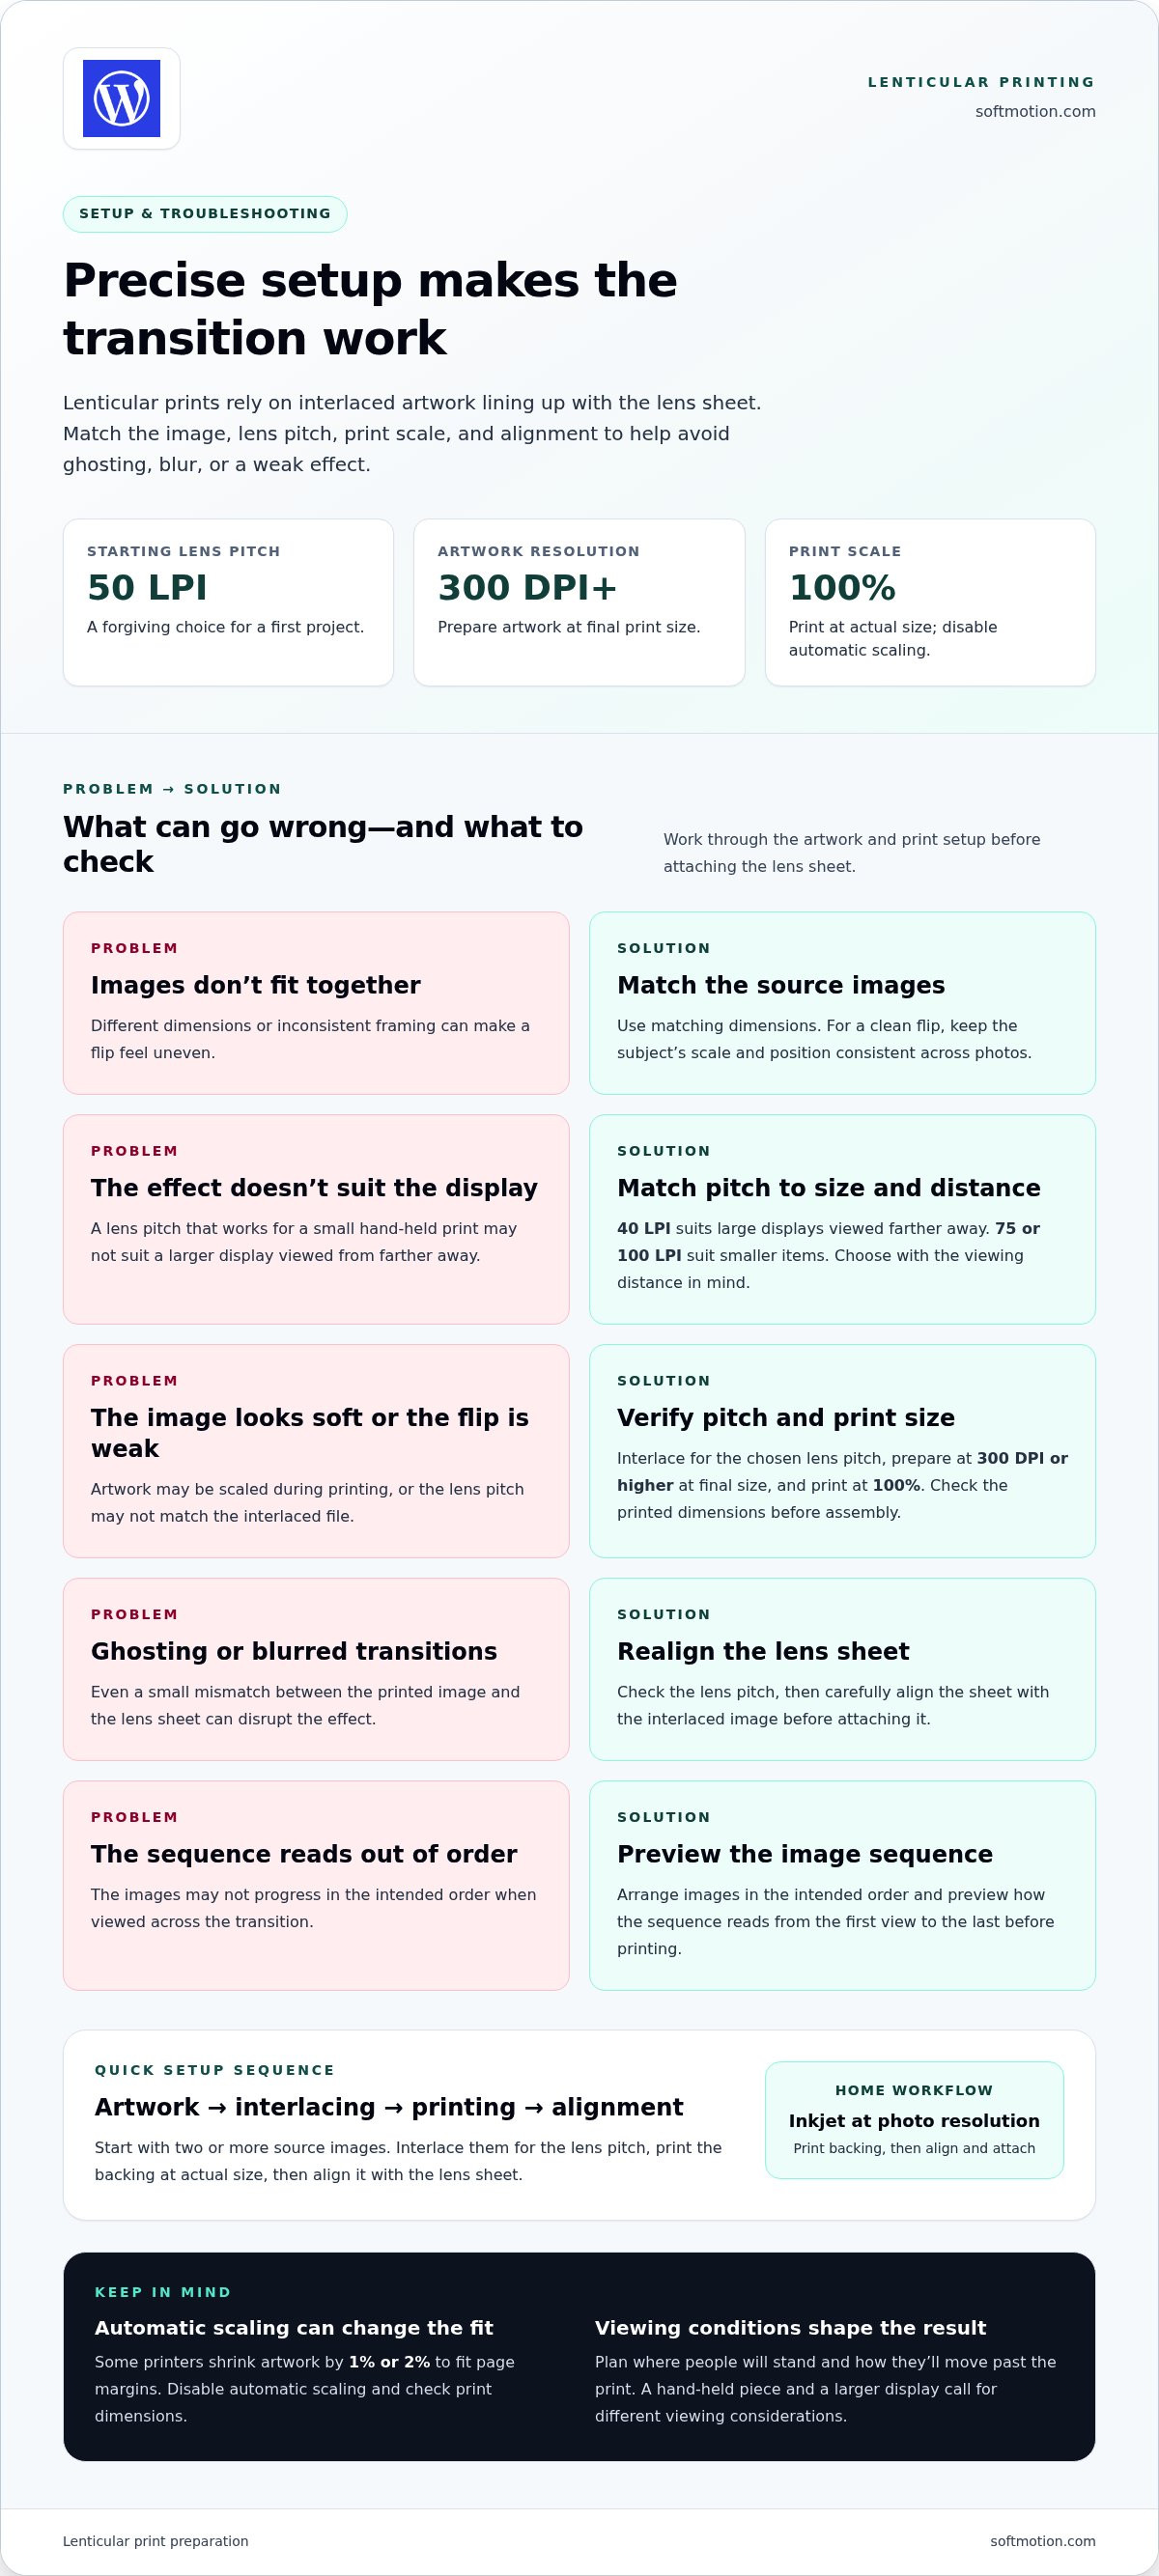
A basic setup uses two or more source images, interlacing software, a lenticular lens sheet, and a printer. Home workflows can print the interlaced backing with an inkjet at photo resolution, then align and attach it behind the lens sheet. Start with 50 LPI for a forgiving first project; 40 LPI suits large displays viewed farther away, while 75 or 100 LPI suit smaller items. Prepare artwork at 300 DPI or higher at final size. Corrugated printing is different: ink goes onto fluted board, whose ridges add surface texture but don’t direct separate images by viewing angle.
Comparison with Related 3D Techniques
Lenticular printing creates glasses-free image changes in a physical print as the viewer moves. Anaglyph images combine color-separated views and typically use colored glasses, while stereoscopic systems present separate views to each eye. A lenticular sheet instead uses tiny lenses to direct interlaced image strips toward different viewing positions. When planning a display, consider the desired movement, viewing distance, and whether glasses are acceptable. Corrugated material adds physical texture, not the same optical depth effect.
To prepare a simple flip, choose two images with matching dimensions, interlace them for the lens pitch, then print at 100% scale. Keep the sheet and printed image aligned: even a small mismatch can produce ghosting, blurred transitions, or a weak flip. Printers sometimes shrink artwork by 1% or 2% to fit page margins, so disable automatic scaling and check print dimensions before assembly.
Custom print pricing depends on format, size, materials, image preparation, and production complexity; the price is provided after a quote request. Minimum quantities vary by format: lenticular posters have a minimum run of 10, greeting cards 50, and bookmarks 500. Confirm the quantity against the intended application before finalizing artwork.
Common problems include ghosting, soft images, and transitions that appear out of sequence. Check the lens pitch, confirm the artwork is printed at 100% scale, and realign the lens sheet with the interlaced image. For custom lenticular prints in the United States, order from a specialist lenticular printer that can prepare and align the artwork for the chosen lens and display format.
Flip, animation, 3D depth, and zoom or morph effects
A lenticular print can reveal a different image, movement, or spatial depth as the viewer changes position. The effect depends on the artwork sequence, lens design, and the viewing path you want people to follow.
Flip and Animation Effects
A flip switches between separate pictures rather than blending them. Lenticular products can flip between 2, 3, or 4 images, making the transition useful for before-and-after scenes, alternate product views, or changing messages. Animation uses a sequence of frames to suggest continuous action. Some prints interlace 15 or 20 frames from a short clip, while full-motion effects can show up to 60 video frames.
3D Depth and Stereoscopic Viewing
Stereoscopic lenticular effects create a glasses-free impression of depth by directing different image views toward each eye. The views show a subject from slightly different positions, giving foreground and background elements a sense of separation. For a convincing result, choose a clear focal subject and compose the scene with distinct depth layers. The viewer’s position matters: moving across the intended viewing zone reveals the dimensional effect.
Zoom, Morph, and Two-Photo Motion
A zoom effect shifts between views that make a subject appear to move closer or farther away. A morph gradually transforms one image into another, such as a face changing expression or a product changing form. A two-image motion effect uses related photos, with the change in angle creating a brisk transition between them. Choose images with compatible framing and a clear visual relationship.
Match the effect to the message. A two-image flip communicates contrast quickly, while a sequence of frames can convey a gesture or short action. A depth effect draws attention into a composed scene, and a morph emphasizes transformation. For example, a poster might switch between two campaign visuals, while an art print could reveal a subtle change in a portrait as viewers pass by.
When preparing files, decide what should change and what should remain visually stable. Keep the subject’s scale and position consistent across photos for a clean flip; use deliberate differences for a morph or zoom. Arrange the images in the intended order, then preview how the sequence reads from the first view to the last before printing.
Viewing distance also shapes the experience. A close-held piece invites small changes in angle, while a larger display needs a composition that reads across a wider space. Consider where people will stand, how they’ll move past the print, and whether the effect should reveal itself gradually or immediately. These choices help determine the image sequence and lens configuration. To plan a lenticular display, connect the desired visual effect with its real viewing environment.
How can I create a lenticular image?
Prepare matching views, interlace their strips, then align the composite with a lenticular lens. Image resolution, lens pitch, and the intended viewing angle all affect clarity and how smoothly the image changes.
Angle-Dependent Image Changes
A plastic lenticular lens contains rows of tiny curved lenses, called lenticules. Each lenticule directs a different strip of the interlaced artwork toward the viewer. As the viewer shifts position, the visible strips change, revealing another image or view. For custom work, plan the main viewing direction and movement path first. Those choices guide how the image strips are arranged beneath the lens.
Flip Effect Creation
A flip uses separate images divided into narrow strips and interwoven into one composite. The lens directs each set of strips toward a different viewing angle, so the first image gives way to the next as someone moves. For a simple two-photo flip, use images with exactly matching dimensions. Keep the subject’s placement consistent if the goal is a clean change, rather than an apparent jump.
Image Creation and Interlacing
Start with photos, video frames, or artwork, then prepare views suited to the chosen effect. Interlacing software slices each source into narrow bands and combines them in sequence. The resulting file must match the lenticular lens pitch and print size. A custom image requires precise alignment: even slight scaling or shifting can make it appear doubled instead of changing clearly.
Quality Specifications
Supply artwork at 300 DPI or higher at final size. Lens pitch also matters: 40 LPI suits large displays viewed farther away, while 75 or 100 LPI suits smaller items. The viewing angle determines where each image strip becomes visible, so test the artwork from the intended position. Select the lens, print dimensions, and image sequence as one coordinated setup.
Use this preparation sequence to reduce avoidable mismatches:
- Choose the effect and arrange the source views in the intended order.
- Match image dimensions, then prepare the artwork at final print size.
- Interlace for the lens pitch, and preserve the original scale during printing.
- Align the printed composite with the lens, then assess the change from several viewing positions.
For example, a two-photo flip needs two equally sized views, while a depth effect needs perspective differences between its views. Inspect fine details and edges across the viewing path. If they blur or double, revisit image alignment and lens pitch before producing the final print.
Historical development and early patents
A lenticular double portrait signed 1692 depicts King Frederik IV and Queen Louise of Mecklenburg-Güstow of Denmark. Made by Gaspar Antoine de Bois-Clair, it shows that angle-dependent picture effects predate modern commercial printing. The portrait offers a useful historical comparison: the image changes with the viewer’s position, while contemporary production can arrange many narrow image strips beneath a lens sheet.
Patent records later documented methods for combining views. John Jacobson filed a United States patent application for an interlaced stereoscopic picture on 11 April 1898. The patent, No. 624,043, was granted on 2 May 1899. Its subject connects two core ideas still recognizable in lenticular work: combining picture information and using viewing position to reveal different visual content.
In 1912, Louis Chéron described a screen with long vertical lenses in French patent 443,216. That detail matters because a lens screen can separate image information by direction. The viewer does not simply look at a flat picture; their position affects which portions become visible. Vertical lenses also provide a straightforward historical example of how lens orientation shapes the viewing experience.
Douglas F. Winnek Coffey received United States patent 2,063,985 for an apparatus for making a composite stereograph on 15 December 1936. The patent’s focus on an apparatus highlights another stage in the medium’s development: producing composite imagery required not only an optical idea, but also a way to make the combined picture.
During the 1950s, companies including Vari-Vue mass-produced lenticular images. Production at scale brought the changing-picture effect into everyday objects, rather than limiting it to specialized optical experiments. The underlying visual principle remained familiar: finely arranged image strips work with a lens surface to make pictures shift as people move.
Music packaging became another platform. The Rolling Stones’ 1967 LP Their Satanic Majesties Request featured a lenticular picture on its album cover. Saturnalia later used lenticular labels on its 1973 Magical Love picture-disc LP. These examples show how albums could use an image-changing surface as part of the physical design, not merely as a printed poster.
The United States Postal Service brought lenticular imagery to stamps in two later examples. It introduced “The Art of Magic” lenticular stamp in August 2018, sold in a souvenir sheet of three. In August 2019, it introduced a lenticular stamp featuring Tyrannosaurus Rex. From a signed portrait in 1692 to those postal issues, the timeline traces a lasting appeal: pictures can respond to movement without becoming moving screens.
Image changes viewed from different angles
A lenticular sheet of tiny lenses makes artwork change as the viewer shifts position. Each lens sends a different image strip toward a different viewing angle. That means the print’s appearance depends not only on its images, but also on where people encounter it. A design intended for a hallway, for example, should reveal its change as viewers walk past.
Think of the surface as a set of narrow windows. From one position, the lenses show strips belonging to one view; from another, they reveal strips from the next. Movement across the print creates the transition. First, identify the main approach direction, such as viewers walking from left to right. Then compose the artwork so the change reads along that path, rather than appearing unexpectedly.
Viewing distance and lens pitch influence how the image reads. A 40 LPI sheet suits large posters or displays viewed from farther away, while 75 or 100 LPI sheets suit smaller items. The lens pitch must match the interlaced artwork; otherwise, details can appear doubled, soft, or out of sequence. Test the print at its intended scale and viewing distance, not only close up on a worktable.
Orientation matters, too. Vertical lenses usually reveal image changes as viewers move sideways, so plan the artwork around that motion. For a display facing a corridor, consider what someone sees while approaching, passing, and moving away. Use a clear visual sequence, such as a closed package changing to its open form. Keep essential text legible in each view instead of relying on one angle alone.
Light and placement shape the experience. Reflections on a glossy lens surface can distract from fine details, while a wall-mounted print viewed from a narrow approach may reveal only part of its intended transition. Before final production, hold a sample at the planned location and view it from several positions. Check that the main image appears clearly, then confirm that the change follows the viewer’s natural path.
The strongest design begins with the viewing journey, not just the artwork. Decide where the audience stands, which direction they move, and what change should catch their attention. Then coordinate lens orientation, pitch, image sequence, and display placement. For example, an advertising display can shift from a product detail to its full presentation as people pass. Plan an angle-responsive lenticular display around the space and the way its audience moves.
Softmotion: Advertising Lenticular Displays
Softmotion creates Advertising Lenticular Displays for campaigns that need imagery to shift as viewers move. The approach is useful when a static message can gain impact from a visual reveal, product transformation, or change between complementary scenes. Planning considers the artwork, viewing direction, and display setting so the angle-dependent effect supports the communication goal.
Softmotion also produces Architectural Lenticular Installations, Fine Art Lenticular Prints, and Tradeshow Lenticular Graphics. Each format brings image change into a different environment, from architectural surfaces to exhibition spaces. The right choice depends on where the work will be seen and what viewers should notice as they move.
To discuss an angle-responsive display for your project, contact Softmotion.
Shape the Next Viewing Experience
Decide what you want people to notice and how movement through a space can reveal it. That creative choice gives lenticular images a purpose beyond visual novelty: they can guide attention, shift a story, or make artwork feel responsive to its setting.
Softmotion can turn that intention into a physical piece, whether the project calls for Advertising Lenticular Displays, Architectural Lenticular Installations, or Fine Art Lenticular Prints. The right direction starts with your audience, the environment, and the moment you want the image to create.
Bring your concept into focus and explore what it could become with Softmotion’s lenticular printing team. A thoughtful starting point can turn a simple surface into an experience people want to view from another angle.
Frequently Asked Questions
Are holographic and lenticular the same thing?
No. Lenticular printing uses a ridged lens sheet to reveal different printed views as the observer moves. A hologram records or reconstructs light patterns to create a different kind of visual representation. Both can suggest depth or visual change, but their production methods differ. For a printed display that switches between prepared pictures as the viewing angle changes, lenticular is the relevant technique. A holographic appearance alone does not mean a piece is lenticular.
What Is Lenticular Technology?
Lenticular technology pairs specially arranged images with a lens surface, creating a visual response to changing viewpoints. Each small lens directs particular image information toward a viewing position. Designers can use this optical behavior to create a changing picture, apparent motion, or depth. The technology ranges from small prints to large visual installations. The result depends on coordinating the image arrangement with the lens and the way people will view the piece.
What are lenticular images and how do they work?
Lenticular images are printed compositions designed to show different views from different positions. A viewer standing in one place sees one image; shifting sideways reveals another or a variation in depth. For example, an illustration might show a closed flower from one position and an open flower from another. The effect comes from the relationship between the printed artwork and the lens surface, not from a screen or digital animation.
What are the different types of lenticular images, such as 3D, flip, and motion?
Common formats include flip, animation, stereoscopic depth, and morph effects. A flip changes between separate scenes, while animation arranges sequential views to suggest action. A depth effect uses differing perspectives to make parts of a scene appear spatially separated. Morphing transitions between related images, such as two stages of a design. Choose based on the story: a product comparison needs a clear flip, while a short gesture benefits from sequential frames.
How are lenticular images made, step by step?
Begin by choosing the intended effect and preparing source artwork for it. For a flip, use matching image dimensions; for depth, prepare views with perspective differences. Next, arrange the image information into narrow interlaced strips matched to the lens sheet. Print the composite at its intended scale, then align it with the lens. Finally, inspect the result from the positions where people will view it, checking that the images appear in the intended order.
What software and equipment are needed to create lenticular images?
A home setup can use image-processing software, lenticular front sheeting, and an inkjet printer. The software prepares the interlaced artwork, which is printed at photo resolution and attached behind the lens sheet. Image-editing software can also help prepare or align source views. The precise workflow depends on the material and format: printing directly onto lens material uses different equipment from printing the interlaced backing separately.
What is lenticular printing and what materials are used?
Lenticular printing combines prepared artwork with a sheet of lenses that directs different image areas toward different viewing positions. The main materials are the lens sheet and printed image layer. In a home process, the interlaced backing can be inkjet-printed and attached behind the front sheeting. Production methods can also print directly onto lenticular material. The chosen approach affects how the artwork is prepared, printed, and aligned.
How much does custom lenticular printing cost in the United States?
Custom lenticular printing prices depend on the project and are provided after a quote request. Key cost factors include finished size, materials, image preparation, the chosen visual effect, and production complexity. A single custom piece and a large installation involve different planning and production work. When requesting a quote, share the intended format, artwork status, viewing environment, and desired quantity so the project requirements can shape an accurate estimate.