
Lenticular Graphics: 2026 Kinetic Tradeshow Guide
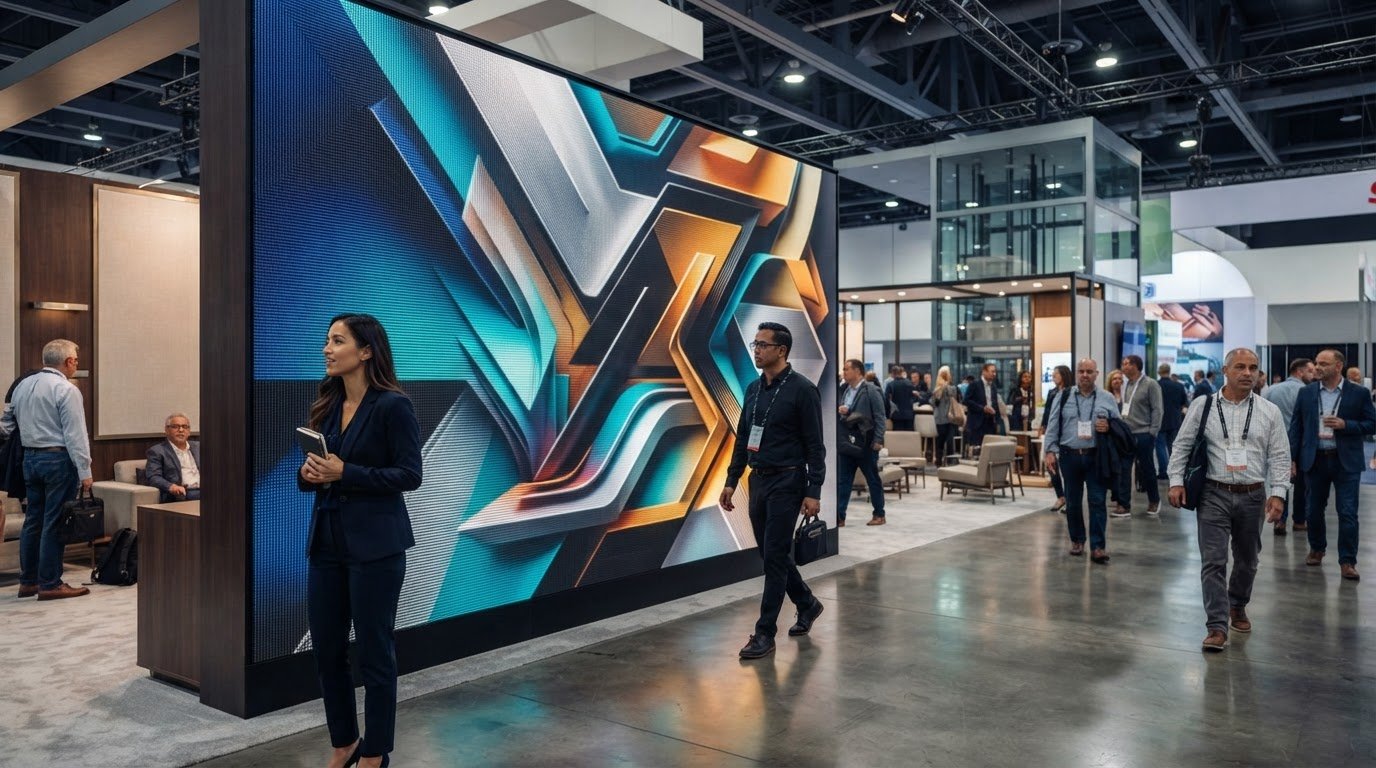
What if your booth could move without a screen, power cable, or another digital display competing for attention? In a crowded exhibition hall, lenticular graphics for exhibitions turn attendee movement into part of the experience. As people walk past, images shift, reveal a sequence, or appear to gain depth. The effect is analog and immediate, making a static surface feel alive.
Digital screens can be useful, but they also bring equipment, power, shipping, and setup considerations. Conventional graphics, meanwhile, may blend into the visual noise of a busy hall. If you want a memorable way to draw people in, hold their attention, and tell your brand story, lenticular graphics offer another option to consider.
This 2026 guide explains how to use large-format lenticular graphics to create motion-driven exhibition environments. You’ll learn how to choose an effect, plan for viewing distance and angles, coordinate fabrication, and prepare for venue installation. With more than 1,000 projects delivered since 1997, Softmotion brings specialized experience to custom lenticular projects, from samples to full-scale installations.
Key Takeaways
- Choose a lenticular effect that supports your booth story, whether you want to reveal a second message or create a sense of depth.
- Use attendee movement to create a visual encounter without relying on screens.
- Consider how viewing distance and lens detail affect image clarity at exhibition scale.
- Plan transport, mounting, and venue coordination early so the graphics suit the booth and installation environment.
- Use a custom sample to assess an effect before committing to full-scale fabrication.
The Psychology of Motion: How Lenticular Graphics for Exhibitions Engage Visitors
In a busy exhibition hall, people may notice movement before they consciously read a message. A visual that shifts as someone walks past can earn a second look without competing through brightness or sound. Lenticular graphics for exhibitions use that response: the image changes with the viewer’s angle, making movement part of the encounter.
Unlike a digital screen, a lenticular surface doesn’t need to play a loop to create motion. Images are interlaced beneath a lens sheet, so different views appear as the observer moves. Lenticular printing technology can produce effects such as image flips, apparent depth, and motion. The result is a physical interaction: the attendee shifts position, and the graphic responds.
A well-planned sequence can encourage visitors to pause and look again, though results depend on the concept, placement, and audience. Make the change easy to understand and rewarding to discover. At larger scale, the effect can extend across a wall or backdrop, turning a booth from a collection of panels into a visual feature visitors can explore from different points in the aisle.
Passive Interaction: Engaging Attendees Without Touch
Not every interaction needs a touchscreen. In a hall filled with devices, an image that changes simply because someone moves can feel immediate and intuitive. The shift may prompt visitors to step sideways, compare views, or invite a companion to see what changes. Kinetic graphics use movement, either built into the image or created by the viewer, to tell a story within a space.
Build the effect around a clear reveal, such as a transition from a product detail to its finished application. Check that the sequence is legible at the distances and angles people are likely to encounter it. The motion should support the message, not distract from it.
Visual ROI: Measuring the Impact of Kinetic Backdrops
Dynamic backdrops can give attendees a distinctive scene to photograph or share, but they don’t guarantee more booth traffic or social reach. Decide what you want to learn before the event, then compare results across exhibitions where possible. Useful measures include how many passersby stop, how many conversations start, estimated time at the booth, and social mentions that refer to the installation.
Because lenticular graphics create their effect without powered screens or media players, they can reduce dependence on display hardware and venue power. Still, account for fabrication, packing, transport, and mounting when comparing options. A custom graphic may be reused across exhibition cycles if its dimensions, condition, and booth design remain suitable. Plan for careful handling and storage so the visual can travel with the brand.
Selecting the Right Effect: Flip, 3D, and Motion for Tradeshow Booths
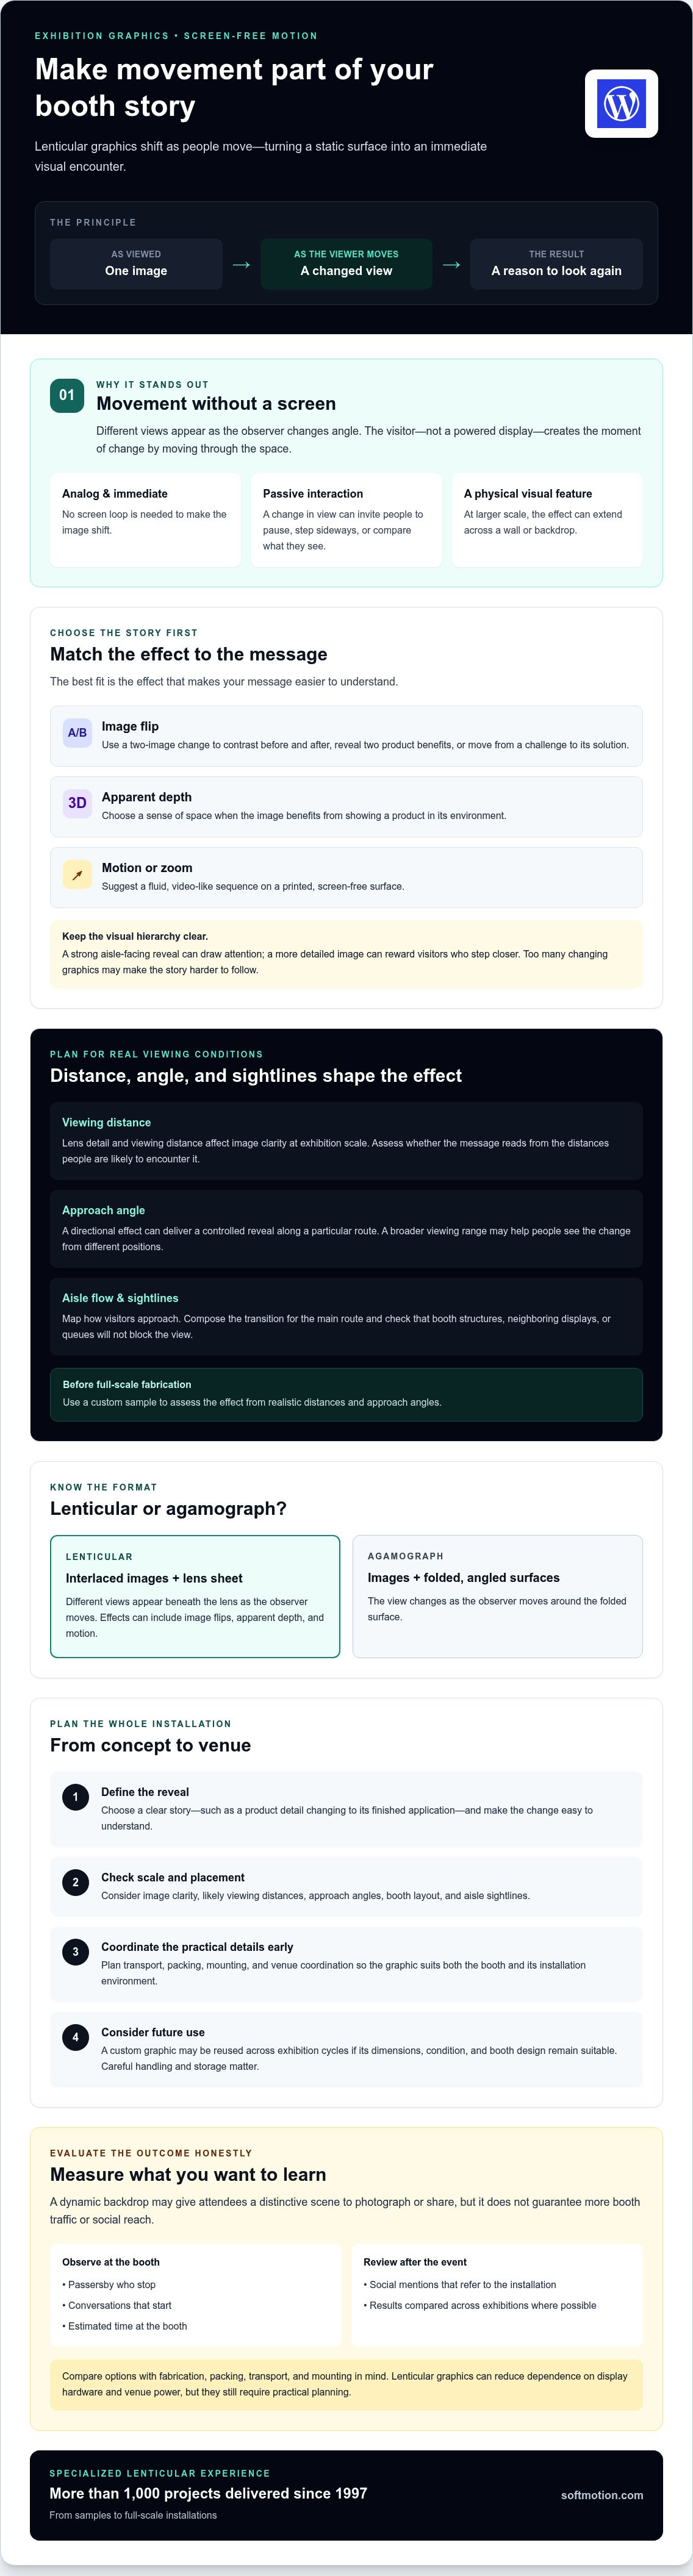
The most suitable effect is the one that makes your message easier to understand. A two-image flip can contrast “before” and “after,” reveal two product benefits, or shift from a challenge to its solution. Apparent 3D depth suits imagery that benefits from a sense of space, such as a product shown in its environment. Motion and zoom effects can suggest a fluid, video-like sequence on a printed, screen-free surface.
For a larger booth, different effects can work together as a story. A bold flip can draw attention from the aisle, while a deeper or more detailed image rewards visitors who step closer. Keep the visual hierarchy clear. If several graphics compete to change at once, the narrative may be harder to follow.
Mastering Viewing Angles for High-Traffic Aisles
Viewing angle is a design decision, not a finishing detail. A more directional effect can deliver a controlled reveal to people moving along a particular route. A broader viewing range may help more people see the change from different positions. The result depends on the lenticular design, image sequence, placement, and sightlines, so assess a sample from realistic distances and approach angles.
Map the aisle flow before positioning the graphic. If most visitors approach from the left, compose the transition to read clearly from that direction. Avoid placing the reveal where booth structures, neighboring displays, or queues will block the main view. Lenticular graphics for exhibitions work best when the intended change aligns with how people naturally move through the space.
Agamograph vs. Lenticular: Which Is Right for Your Exhibit?
An agamograph uses images arranged across folded, angled surfaces, creating a change in view as the observer moves. A lenticular graphic places interlaced imagery beneath a lens sheet, so the viewed image shifts with the angle. An agamograph has a visibly structured, sculptural rhythm, while a lens-based lenticular graphic can support fine image transitions, apparent depth, and fluid motion.
Consider an agamograph when the folds themselves should contribute a bold, architectural presence. Choose a lens-based lenticular effect when image detail, 3D depth, or a smoother sequence is central to the story. For a useful next step, review this guide to large-format lenticular printing as you shape the concept and decide what to test in a sample.
Engineering for Impact: Large-Format Lenticular Fabrication and Materials
At exhibition scale, the effect depends on more than the image. Lens material, print alignment, viewing distance, panel joins, and venue requirements all shape what attendees see. For lenticular graphics for exhibitions, consider these decisions together and early in the design process, rather than treating them as finishing details.
Acrylic, PETG, and PVC can differ in weight, handling, and performance, but suitability depends on the specific material and finished construction. Don’t assume a substrate meets a venue’s fire requirements based on its name alone. Ask what documentation applies to the exact graphic assembly, and confirm the venue’s requirements before production. For touring displays, weigh material choice against transport, installation, and repeated handling needs.
LPI means lenses per inch, a measure of the lenticular sheet’s lens density. It affects how the image is divided and how the effect reads from a given distance. A design viewed close up may need a different balance of detail and angle sensitivity than one intended to be seen across an aisle. Test samples from expected viewing positions, not just straight on at a desk.
The Importance of Precision Printing at Scale
Registration is critical: the printed image sequence must align with the lens structure, and large panels must stay consistent across the full composition. Misalignment can create ghosting, soften transitions, or make a 3D image feel unsettled. Micron-level precision in print-to-lens alignment helps keep each image element positioned beneath its intended lens.
Explore the considerations involved in large-format lenticular printing, especially when planning a mural or multi-panel wall. To reduce visible joins, coordinate panel edges and image sequencing during design, and confirm how the components will align in the finished installation. A proof or sample can help identify issues before they extend across the full surface.
Fire Ratings and Venue Compliance
Requirements vary by venue and location. ASTM E84 is one test method venues may reference, but don’t assume it applies to every exhibit or that a material’s test result automatically covers the complete graphic assembly. Confirm the required standard, documentation, and approval process with the venue. Then have the project team verify that the selected construction meets those requirements before fabrication.
Scratch resistance and UV protection also depend on the chosen materials and any specified protective treatments. For a multi-year tradeshow tour, ask how the surface should be packed, cleaned, and stored, and whether the intended finish suits repeated handling. Careful planning helps preserve image clarity and the kinetic effect from one exhibition cycle to the next.
The Logistics of Success: Transport, Rigging, and On-Site Installation
A large lenticular graphic needs to arrive in the same condition it left production. Plan transport and installation alongside the creative work, not after it. Before fabrication, confirm the finished dimensions, panel breaks, total assembly weight, route into the venue, and how the graphic will be secured. Lenticular graphics for exhibitions can be sensitive to surface damage and alignment shifts, so protective packing and a clear handling plan matter.
For oversized panels, coordinate suitable crating with the fabricator and freight team. Define who receives, stores, opens, and moves each component, and identify the correct orientation for unpacking. Wall-mounted graphics and suspended backdrops have different support needs. The booth builder and venue team should review the assembly weight, attachment points, substrate support, and rigging plan. Don’t estimate these from appearance. Use project-specific technical information and obtain venue approval.
Show setup can be compressed into a short window, sometimes around 48 hours. Treat that as a coordination challenge, not a universal schedule. Build an installation sequence that reserves time for the booth structure, graphic placement, alignment checks, and lighting adjustments. Confirm access times and dependencies with the organizer and contractors in advance, and assign a contact to make installation decisions.
Coordinating with Exhibition Contractors
Share drawings, panel dimensions, orientation, handling instructions, and support requirements with the booth builder before the components arrive. Agree on rigging points and who verifies them, especially for suspended work. For touring exhibits, document packing order and installation steps so teams in different locations can follow the same plan. Learn more about lenticular installation project management for coordinated exhibition displays.
Lighting Strategies to Enhance the Kinetic Effect
Lighting changes how a lenticular surface reads. Direct overhead light can create glare or uneven brightness, obscuring image transitions. Poorly positioned spotlights may also produce bright hotspots across a large wall. Test the graphic under venue-style lighting where possible, viewing it from the approaches attendees will use. Adjust fixture angles and spread to support depth and even illumination rather than directing a harsh beam straight onto the lenses.
Before opening, inspect panel joins, image alignment, and the effect from multiple viewpoints. Softmotion’s experience includes large-scale exhibition projects and on-site assembly. Discuss your tradeshow lenticular graphics project with the team as you plan fabrication and installation requirements.
Softmotion Fabrication: Prototype to Global Install
Large-scale kinetic graphics bring creative ambition and technical detail together. Softmotion works with architects and advertisers on custom lenticular projects from concept through fabrication and installation. The process connects the visual idea to its intended space: clarify the story, consider the viewing environment, and resolve key decisions before full production.
For lenticular graphics for exhibitions, a concept must work at the intended scale and from the angles attendees will encounter it. A small sample makes the effect tangible early, giving the team a way to assess image transitions, viewing angles, and color before committing to a larger build. That feedback supports clearer decisions as the project develops.
Prototyping for High-Stakes Events
A rendering can communicate the broad idea, but it can’t fully reproduce how a physical lenticular surface changes as someone moves. Reviewing a sample lets stakeholders experience the effect directly, discuss whether the visual sequence tells the intended story, and identify adjustments before full production. Explore the process behind custom lenticular prototypes to see how sampling can inform ambitious projects.
Softmotion helps connect creative goals with fabrication realities, from early visualization to final installation. A sample serves as a practical checkpoint and a shared reference for evaluating movement, appearance, and the intended viewing experience.
Partnering for the Future of Experiential Design
Since 1997, Softmotion has delivered more than 1,000 projects and has worked with Fortune 500 corporations. Its work spans large-scale architectural and exhibition environments, with end-to-end production that can include on-site assembly and global installation. This experience helps connect a two-dimensional concept to the needs of a physical environment.
For architects, advertisers, and exhibition teams, a surface can do more than display a message. It can reveal different views, create a sense of depth, and invite people to participate simply by moving through the space. Learn more about exhibition possibilities with Softmotion’s lenticular team.
Bring Movement to Your Next Exhibition
A memorable booth begins with a clear story. Choose a lenticular effect that supports that story, then plan viewing angles, materials, and installation details as parts of one coordinated project. With lenticular graphics for exhibitions, attendee movement can help bring a static brand message to life.
Softmotion guides custom projects from early concept and sampling through fabrication and installation. The company has delivered more than 1,000 projects worldwide, with work for Fortune 500 corporations and global architectural clients. A physical sample can help your team assess the effect and refine the direction before full production.
Ready to explore what motion could bring to your booth? Request a custom lenticular sample for your next exhibition and start planning a visual experience visitors can discover as they move through the space.
Frequently Asked Questions
What is the maximum size for a lenticular exhibition graphic?
There isn’t one maximum size that applies to every lenticular exhibition graphic. Practical dimensions depend on image design, lens material, panel construction, transport route, support structure, and installation conditions. Large-format projects may use multiple panels, with image sequencing and joins planned together to create a cohesive effect. Share your intended dimensions and venue details with the fabricator early so the design and installation approach can be assessed as one project.
Can lenticular graphics be used for outdoor exhibition booths?
They may be suitable for an outdoor booth, but don’t assume an indoor graphic will withstand outdoor conditions. Exposure to sunlight, moisture, wind, temperature changes, and the booth’s support structure can affect material selection and installation planning. Describe the environment and length of exposure to the fabricator, and confirm which materials and construction are appropriate. A sample can help assess the visual effect, but it doesn’t establish outdoor durability by itself.
How do I choose between a 2-image flip and a 3D effect for my booth?
Choose a 2-image flip when the message depends on a clear change, such as a before-and-after comparison or two complementary product benefits. Choose 3D when depth helps viewers understand the subject or imagine it in a setting. Consider the audience’s viewing distance and approach angle, too. A sample viewed from realistic positions can help you judge which effect communicates your story clearly. Lenticular graphics for exhibitions work best when the effect supports, rather than distracts from, the message.
Are lenticular panels heavy to ship and install?
Weight depends on the graphic’s dimensions, lens material, backing, frame, and other components, so it must be confirmed for each project. Before shipping, ask for the finished assembly’s weight and handling requirements. Give those details to your freight provider, booth builder, and venue team. For wall-mounted or suspended graphics, coordinate substrate support and rigging points in advance. Crating, access routes, and the installation method also affect logistics.
How long does the fabrication process take for a large-scale exhibition project?
There’s no single lead time for every large-scale exhibition project. Timing depends on the concept, dimensions, effect, sampling and approval stages, fabrication complexity, transport, and installation requirements. Build a schedule with the project team that includes time to review a physical sample and confirm venue details before production. Share the event date and installation window early, then ask the fabricator to confirm a project-specific timeline before making commitments.
Can lenticular graphics be illuminated from behind?
Backlighting may be possible for some designs, but it shouldn’t be assumed to suit every lenticular construction. The lens material, image, backing, light source, and viewing conditions all affect the result. Ask the fabricator to assess the proposed assembly and test the graphic with the intended illumination before full production. Also check how lighting changes the image from different angles and whether glare or uneven brightness could interfere with the effect.
What happens if a panel gets scratched during a tradeshow?
A scratch on the lens surface can affect the image and the way its transitions appear. Protect panels during transport, unpacking, installation, and storage, and follow the fabricator’s handling and cleaning guidance. If damage occurs, photograph the area and contact the fabricator before trying to polish, sand, or repair it, since an unsuitable method may cause further damage. Whether a panel can be repaired or needs replacement depends on its material and the location and severity of the scratch.
Do I need special software to design files for lenticular printing?
You may not need to create the final interlaced production file yourself, but the artwork must be prepared for the intended lenticular effect. The design process can involve sequencing images, considering viewing angles, and matching artwork to the selected lens. Softmotion provides custom lenticular design and production, so discuss your concept and available source files with its team. Confirm file formats and design responsibilities before production begins, especially if multiple images or a 3D effect are involved.